![NextPatient_Logo_RGB_Charcoal (2).png]](https://help.nextpatient.co/hs-fs/hubfs/Logos/NextPatient%20Logos/NextPatient_Logo_RGB_Charcoal%20(2).png?height=31&name=NextPatient_Logo_RGB_Charcoal%20(2).png)
NextPatient's Reputation Management feature helps your practice collect patient feedback, build your online reputation, and attract new patients through reviews on platforms like Google, Facebook, and Healthgrades.
After a patient's visit is marked as Completed, NextPatient can automatically send a review request or allow your team to send one manually.
This guide walks through setting up your review requests and sending them to patients.
Configure your review request settings
- Log in to your NextPatient account.
- Navigate to Settings > Surveys.
- Review your practice's settings under Patient Surveys.
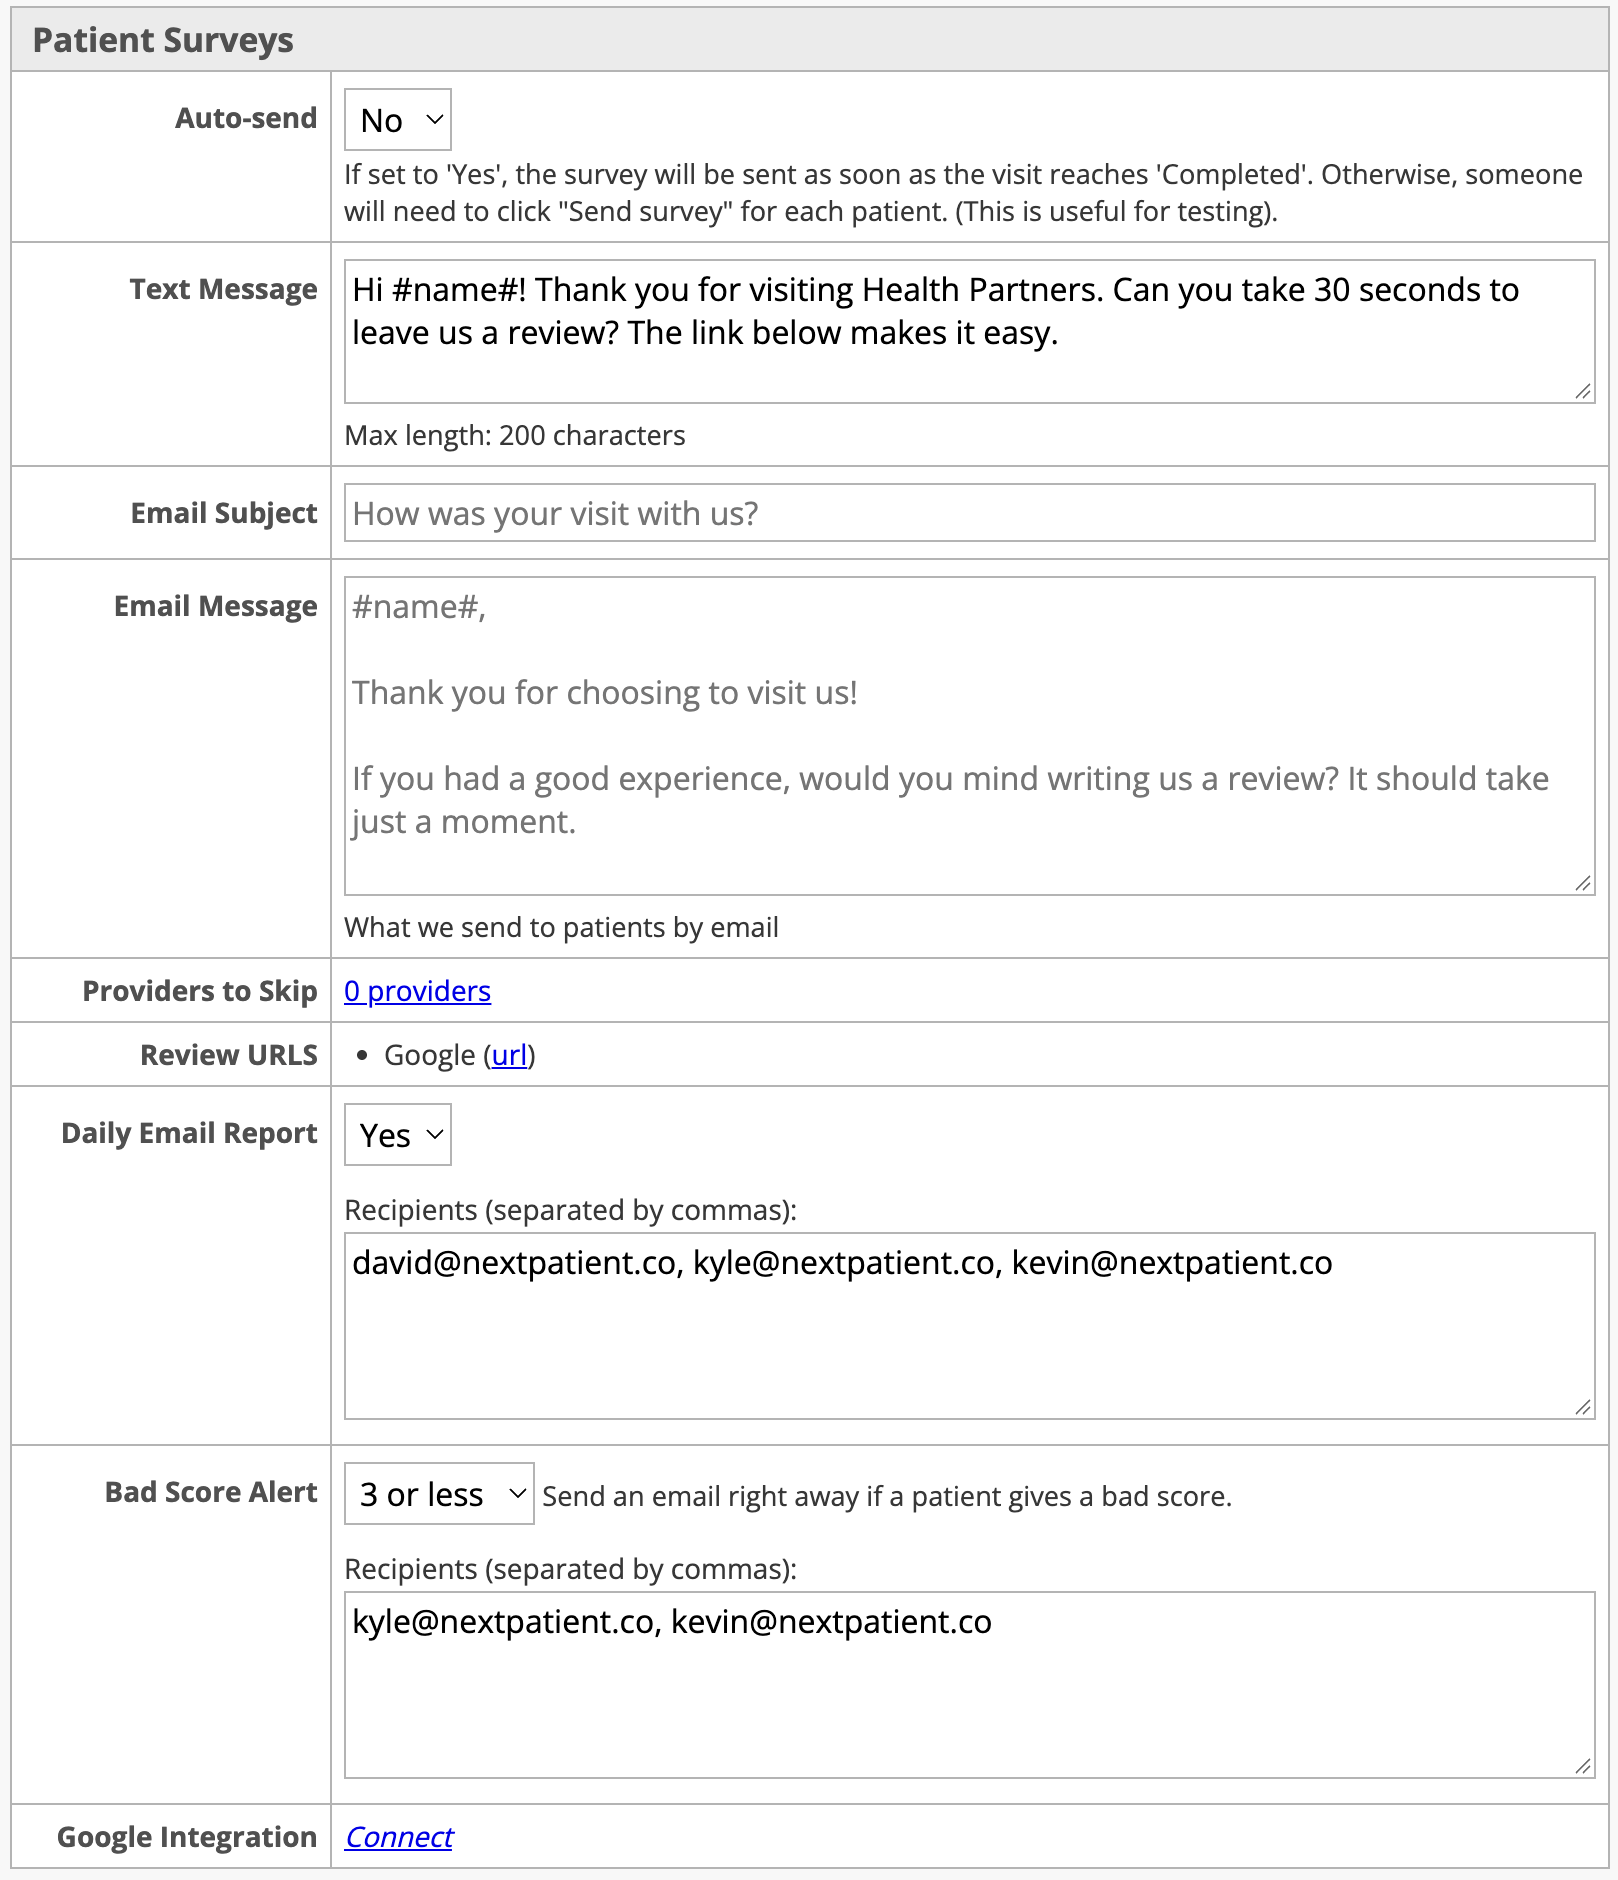
Choose whether to send review requests automatically
The Auto-send setting determines whether review requests are sent automatically when a patient's visit is marked as Completed.
- Yes: NextPatient automatically sends a review request when an eligible visit is marked as Completed, unless another setting or restriction prevents delivery.
- No: Review requests must be sent manually after the visit is marked as Completed.
Our recommendation: For practices requesting Google reviews, we generally recommend enabling Auto-send. Consistently requesting reviews helps increase review volume, strengthen your practice's online presence, and make it easier for prospective patients to find you.
If you prefer to review visits before requesting feedback or are testing your configuration, you can leave Auto-send disabled.

Customize your review request messages
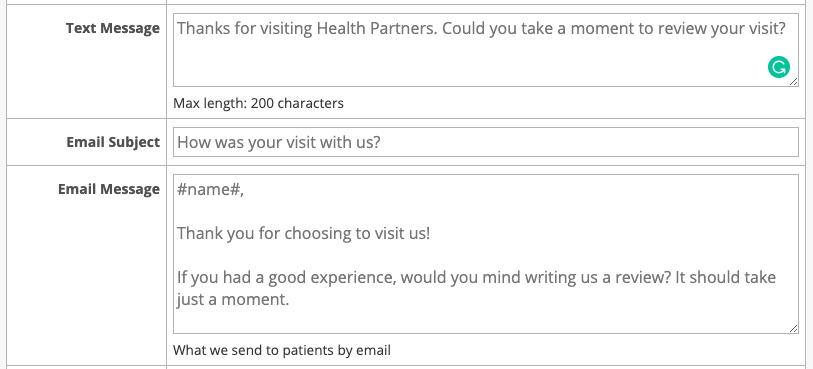
You can customize the text message and/or email patients receive when they're invited to leave a review.
Depending on your practice's configuration, you may see fields for:
- Text Message: The message included in a text-based review request (maximum 200 characters).
- Email Subject: The subject line of your review request email.
- Email Message: The body of your review request email.
Messages can be personalized using supported tokens, such as #name#, which automatically inserts the patient's name.
The fields available in your account depend on how your practice is configured to deliver review requests. Some practices use text messages, others use email, and some use a combination of both.
For detailed instructions and messaging recommendations, see Customize post-visit survey messages.
Configure your review destinations
Review requests can direct patients to supported destinations, including Google, Facebook, and Healthgrades. NextPatient can also be configured to collect feedback through an internal survey rather than directing patients to a public review platform.
Your NextPatient implementation or Customer Success team can help configure the appropriate review destinations for your practice.
The Review URLs section displays the destinations currently configured for your account.

If your practice uses Google reviews, we also recommend connecting your Google Business Profile to NextPatient. This allows you to monitor Google reviews directly in your Surveys dashboard and access additional reporting insights.
For instructions, see Connect your Google Business Profile.
Manage provider exclusions
If you don't want review requests sent after appointments with certain providers, you can configure exclusions using Providers to Skip.
Your Customer Success Manager can also assist with provider-specific review destinations, where applicable.

Additional settings
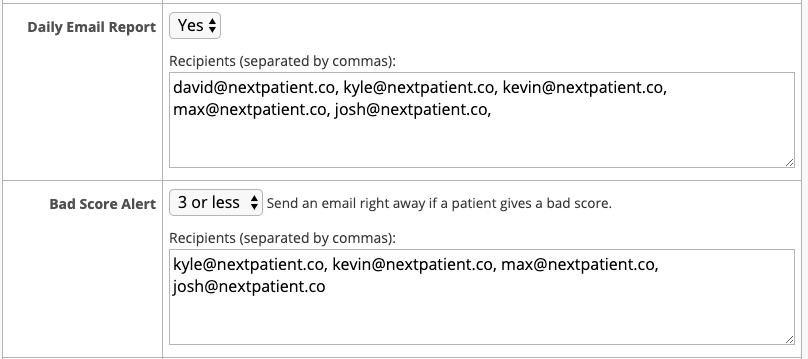
The Surveys settings page also includes options to help your team stay informed about patient feedback:
- Daily Email Reports: Receive a nightly summary of your practice's review activity. See Add recipients to the daily survey email.
- Low-Score Alerts: Receive notifications when patients submit ratings below your selected threshold. See Turn on low survey score alerts
These features can help your team monitor feedback without needing to check the Surveys dashboard throughout the day.
Important: After making changes to your settings, click Update to save them.

How to send review requests manually
If Auto-send is set to No, your team can send individual review requests after a patient's visit is completed.
Step 1: Mark the visit as Completed
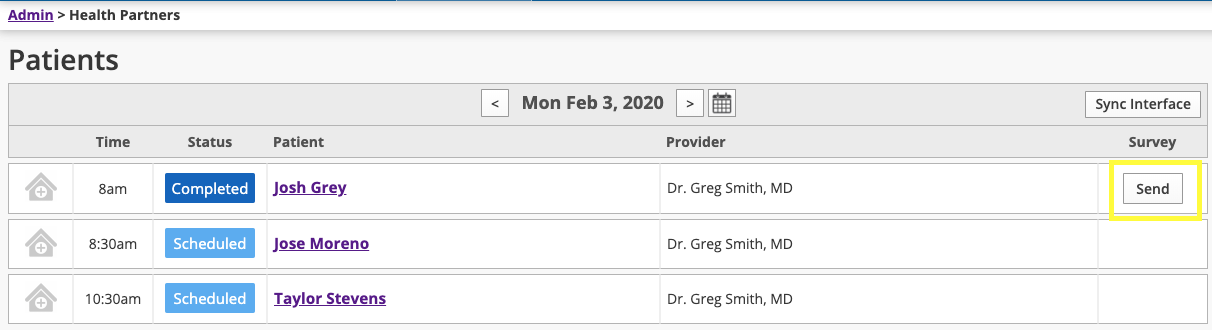
From the Today's Patients screen, locate the patient whose visit has finished.
If the visit is not already marked as Completed:
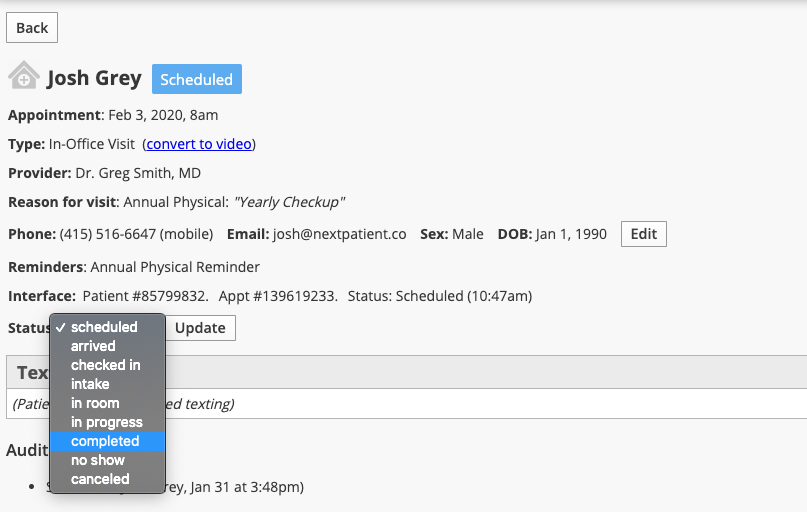
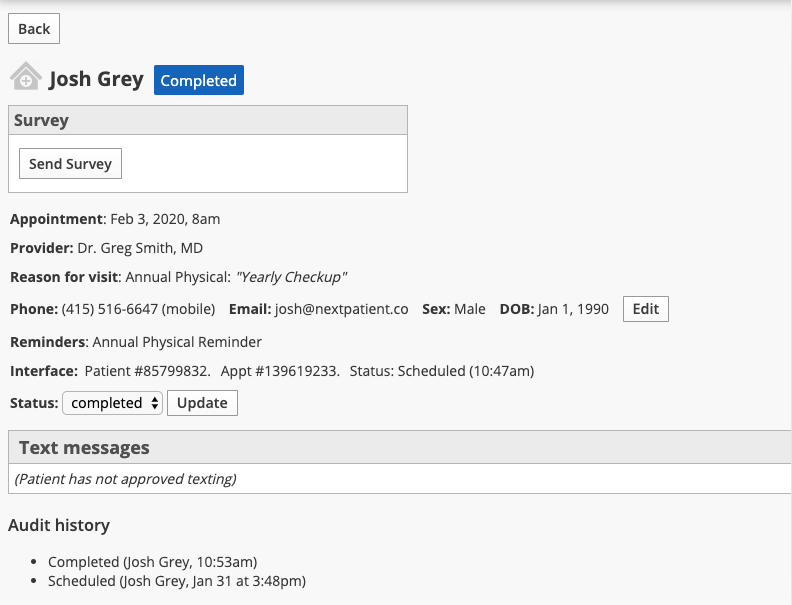
- Click the patient's name to open their appointment details.
- Change the appointment status to Completed.
- Click Update to save the status change.
Step 2: Send the review request
Once the visit is marked as Completed, the option to Send Survey becomes available.
Click Send Survey to send the review request to the patient.
You can also access the manual sending option from the Today's Patients screen.
Step 3: Review the survey status
The Survey column on the Today's Patients screen provides information about the review request's status.
If a request is queued, it will display Queued.
Keep in mind that review requests are subject to your practice's delivery settings and the patient's communication preferences.
What does the patient receive?
Depending on your practice's configuration, patients may receive a text message, an email, or both, inviting them to share feedback about their visit.
The message includes a link that directs them to your practice's configured review destination or internal survey.
For example, if your practice requests Google reviews, patients can follow the link to leave a review on Google.
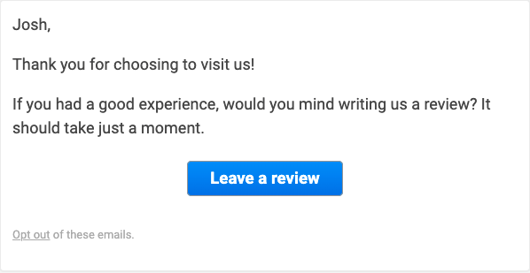
Click "Leave a review" then directs them to Google.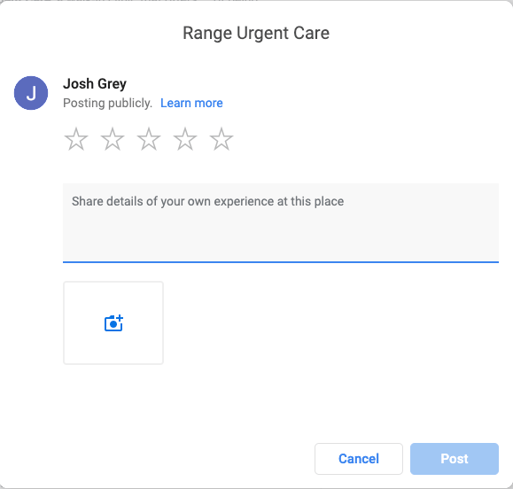
Need help?
If you're unsure which settings are right for your practice, want to change how review requests are delivered, or notice that your settings page looks different from the examples shown, please reach out to your Customer Success Manager.
To learn how to monitor patient feedback and review results, see Review post-visit survey results.